Spider plant brown tips usually trace back to a short list of causes: dry air, a pot that swings between bone-dry and soggy, fertilizer salts building up in the mix, or tap water the plant doesn’t tolerate well. The brown tissue won’t turn green again, but correcting the cause can help protect new growth. Check the soil and the pattern of damage before you add water, fertilizer, or a bigger pot.
A few crispy tips on otherwise firm, green leaves need a different response from spreading browning accompanied by yellow leaves or a soft base. Start by deciding which of those two you’re looking at.
What causes spider plant brown tips?
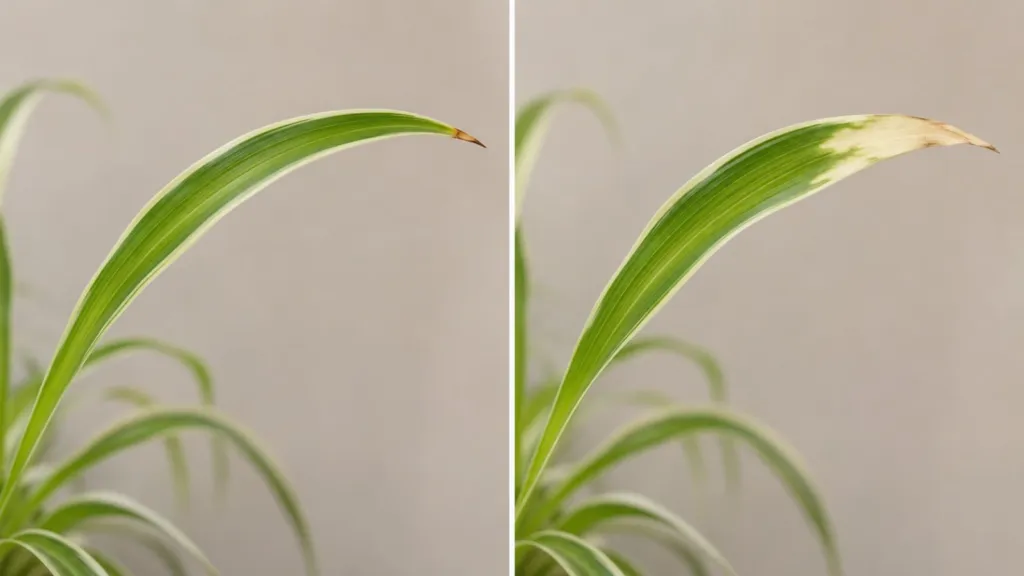
Brown leaf tips show up on many houseplants, and Iowa State Extension names spider plants as one of the species where they are common. It calls low humidity the most likely cause in general, then lists inconsistent watering, too much fertilizer, and water quality. Clemson Extension’s spider plant factsheet points to the same group: too much fertilizer or water high in soluble salts, plus low humidity and excessively dry soil.
More than one of these can be at work at the same time. Use the clues around the damage to decide what to check first.
| What you see | Possible causes | Check first |
|---|---|---|
| Dry tips on many leaves, rest of each leaf still green | Watering stress, water quality, fertilizer salts, or dry air | Water source, feeding history, nearby vents |
| Brown tips with dry, curling leaves | Soil drying out too far | Moisture deep in the root ball, pot weight |
| Browning with wilting and a mix that stays wet | Poor drainage or root rot | Drainage holes, standing water, root condition |
| Pale or scorched patches on the window side | Strong direct sun | Midday sun, a recent move closer to the glass |
| White crust on the mix or pot rim | Fertilizer or mineral buildup | Feeding schedule, flushing the pot |
| Fine pale speckling with fine webbing | Possible spider mites | Leaf undersides and visible moving specks |
| Sticky residue with visible insects | Possible honeydew-producing pests, such as aphids | Leaf undersides, young growth, and insect identification |
Overwatered vs. underwatered spider plant: check the pot first
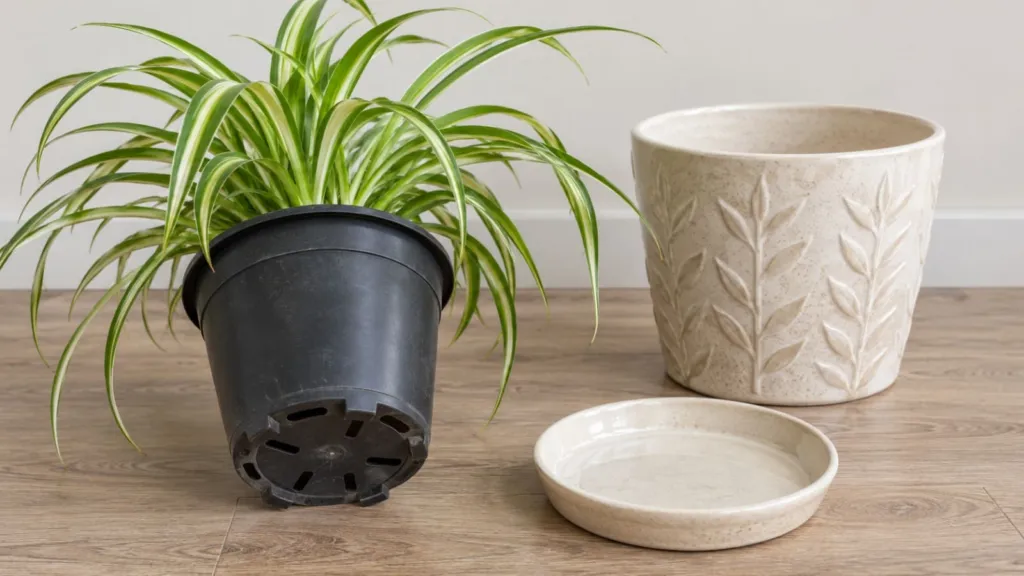
Don’t judge watering by the leaf tips alone, because both extremes can brown them. Look at the mix instead. Push a finger an inch or two below the surface and lift the pot to feel its weight. A dry surface can hide a damp root ball, and a soggy pot can look fine on top.
Here is how the two problems usually differ:
- Underwatered: the mix is dry well below the surface, the pot feels light, and leaves look dry or curled. Tips are crisp.
- Overwatered: the mix stays wet for days, the pot feels heavy, and leaves may yellow or wilt even though the soil is damp. The base of the plant can feel soft.
If the mix is dry, water thoroughly until it runs out of the drainage holes. Iowa State’s houseplant care guide advises emptying the saucer or outer pot after 30 to 45 minutes, since roots left in water can rot. If the mix is still wet, wait a day or two and check again. Clemson advises letting spider plant soil dry slightly between waterings, so the goal is an even rhythm with good drainage, not repeated swings between parched and saturated.
Inspect the roots if wet soil and wilting show up together
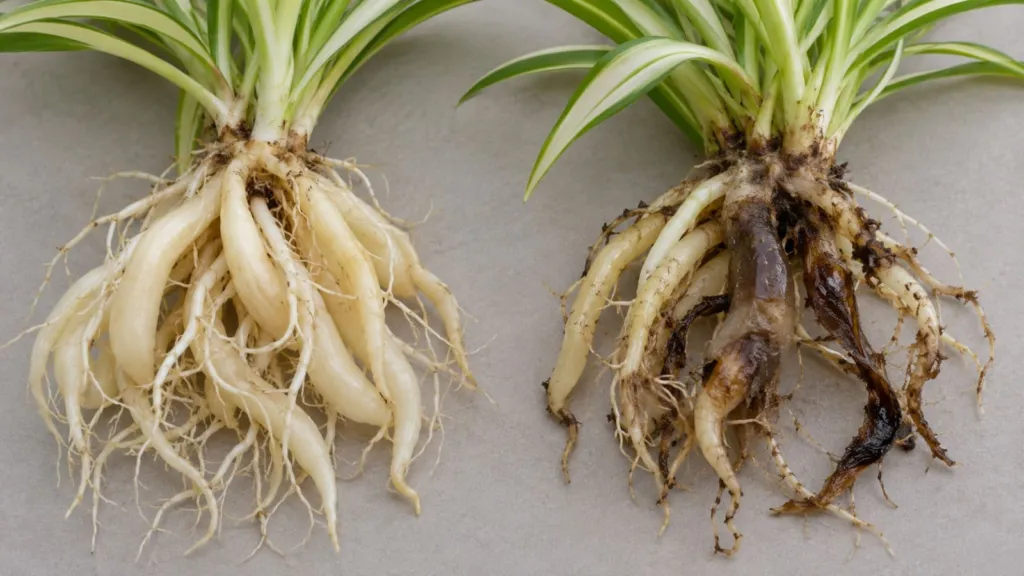
If the plant keeps declining while the mix stays wet, slide it out of the pot. The University of Maryland Extension’s diagnostic guide describes healthy roots as light-colored and firm, and diseased roots as dark and soft. Where only part of the root system is rotten, cut away the soft portions with clean tools and repot into fresh, well-draining mix. If almost everything is mushy, there may be too little healthy tissue left to save.
Two cautions. First, spider plants naturally grow thick, fleshy roots, so plump roots alone are not a warning sign. Second, a crowded root system is a separate issue. Clemson advises dividing and repotting before the roots expand enough to crack the container, and tightly packed roots can contribute to tip browning. Crowding alone doesn’t mean the roots are rotting, so look at texture and color before you cut anything.
The best water for spider plants
If the moisture and drainage look right, look at what’s coming out of the tap. NC State’s advice is specific to spider plants, while Iowa State’s broader guidance covers houseplants in general. NC State Extension’s spider plant profile recommends avoiding tap water because chlorine and fluorides can cause leaf-tip burn. Iowa State notes that water safe to drink works for most houseplants, while its separate leaf-tip guidance lists spider plants among species that can react to chlorine and fluoride over time. Iowa State also notes that heavily softened water can leave salts behind in the pot.
If you suspect your water:
- Switch the source. Iowa State calls rainwater the ideal water for most plants. Distilled water is another option for sensitive plants.
- Check what “filtered” means. Boiling does not remove fluoride, and ordinary carbon pitcher filters generally don’t either. Distillation and reverse osmosis are different processes, so look for a filter whose label states fluoride reduction.
- Don’t count on letting water sit. Standing water may let some chlorine dissipate, but fluoride doesn’t evaporate and neither do dissolved salts.
- Look up your water report. If your home is served by a community water system, check its annual Consumer Confidence Report or ask your supplier about fluoride and other relevant water-quality details.
If water quality seems plausible, try a different water source while keeping the rest of the care as consistent as practical. Improvement in new growth may suggest that the water source contributed, but it will not identify a particular chemical. Changing the source won’t repair damage that’s already there.
Check for fertilizer-salt buildup
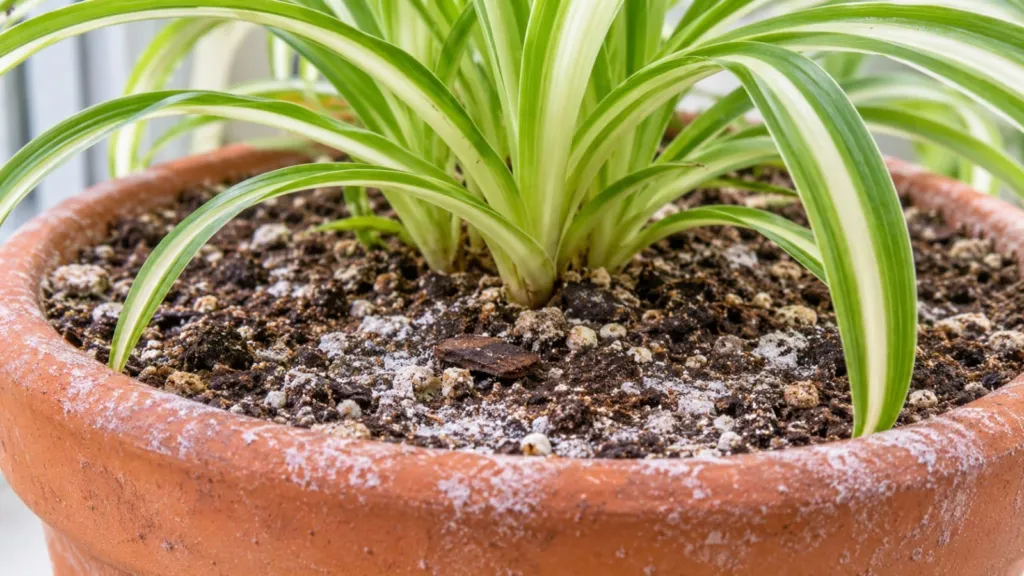
Brown tips after repeated feeding, especially with a white crust on the mix or pot rim, point to salts. Clemson says leaf tip burn is caused by too much fertilizer or water that is high in soluble salts, and Maryland Extension also links excess fertilizer to browning of leaf tips and margins.
What to do:
- Pause feeding while you sort it out.
- Flush the pot if it drains freely. Slowly pour water through until it runs out of the bottom, let it drain fully, and repeat a couple of times. Thorough watering and regular repotting can help reduce salt buildup. Don’t keep pouring water into a pot with blocked drainage or already soggy roots.
- Restart gently. Resume light feeding only when the plant is growing well, using the product’s indoor-plant directions and accounting for fertilizer already in the mix.
More fertilizer is not a fix for brown tips. It can make them worse.
Related care guides for Spider Plant Care: Light, Water, Soil, and Brown Tips
Spider plant humidity, drafts, and light
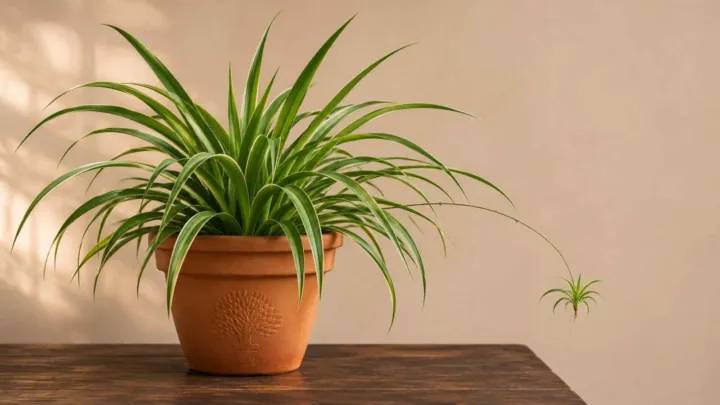
Spider plant humidity problems are most likely in a heated winter room. Iowa State says most houseplants prefer 40 to 50 percent humidity, while many homes fall far below that in winter, sometimes as low as 10 percent. A small hygrometer shows you what your room is really doing.
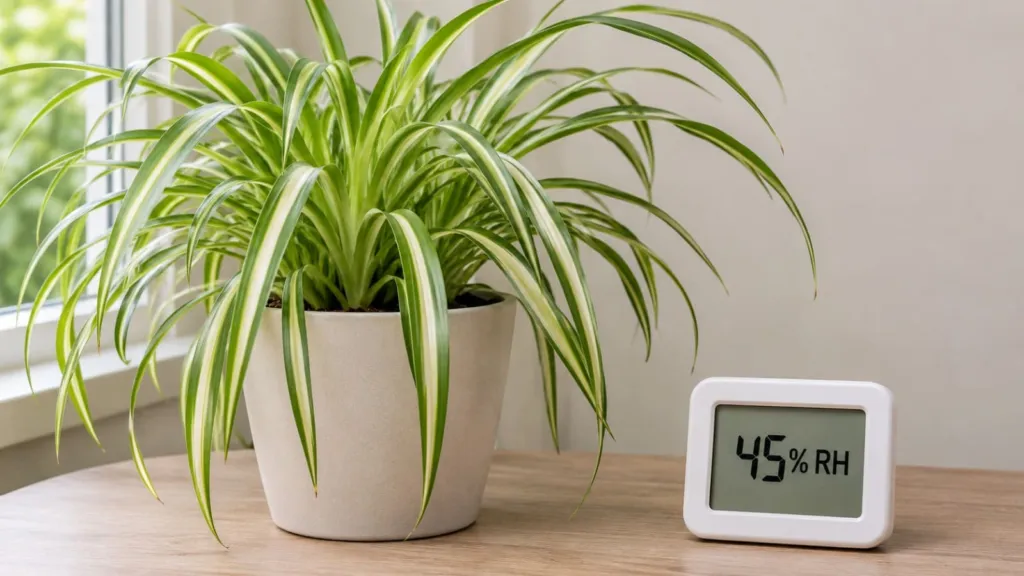
To raise humidity around the plant:
- Group plants together. Their collective leaves help hold humid air.
- Use a humidifier. More expensive to run, but effective at raising humidity throughout the room.
- Try a pebble tray, with the pot sitting above the water, never in it.
Skip the daily misting. Iowa State explains that misting does not raise humidity for more than a few minutes and can help spread disease. It’s fine for dusting leaves, but it isn’t a humidity plan.
Also check for drafts. Keep the plant away from heat registers, radiators, and cold air from doors and windows. Big temperature swings can cause browning, and Clemson recommends moving spider plants a few feet from windows in winter. Its suggested daytime range is 65 to 75 degrees Fahrenheit.
Finally, look for sun scorch. Spider plants grow best in bright, indirect light and tolerate some direct sun, but Clemson warns that midday light may scorch the leaves. If the damage is on the side facing the glass, move the plant back or filter the light with a sheer curtain. For broader placement and care questions, see our spider plant care guide. If you’re thinking about a bathroom, our guide to plants for a bathroom with a frosted window explains how to judge whether the light is enough.
A quick pest check
Sap-sucking pests can also cause browning. Clemson lists whiteflies, spider mites, scales, and aphids as the common pests on spider plants. Look at the undersides of leaves and along the stems. Fine webbing with pale speckling can point to spider mites; sticky residue can be honeydew from pests such as aphids. Identify the pest before choosing a treatment, and address it alongside the care changes above.
Spider plant brown tips after repotting: what to check
If you notice spider plant brown tips after repotting, review the new setup before you repot again. The old watering routine may not suit fresh mix and a different container.
- Drainage: confirm water escapes and the plant isn’t sitting in runoff.
- Pot size: bigger isn’t better. Move up only one size, maybe two, because an oversized pot holds wet mix around the roots. Avoid putting gravel in the bottom, which creates a wetter zone near the roots.
- Feeding too soon: fresh potting mix usually contains a little fertilizer. Iowa State’s 2-to-4-week interval is general houseplant guidance, while Clemson recommends waiting four to six months before feeding newly potted spider plants. For this plant, use the species-specific advice as your starting point, check the mix and fertilizer labels, and hold off while the plant is stressed.
- Root disturbance: repotting often involves loosening the root mass and removing limp or dead roots. A plant with a disturbed root system may need time to settle in, so aim for evenly moist mix that is never soggy.
If the roots are firm and the leaves are upright, leave the plant alone instead of digging it up repeatedly. Soft, discolored roots with a persistently wet mix need the closer inspection described earlier.
How to tell whether your changes are helping
Old brown ends stay brown, so judge progress by the new leaves and by whether the damage is still spreading. Recovery depends on growing conditions and root health, so avoid expecting improvement by a fixed date.
Take a photo of the same leaves now and note recent changes in watering, feeding, water source, and placement. Change one thing at a time when you can. If you change everything at once, you won’t know what worked.
Spreading discoloration, a soft center, or continuing collapse deserves faster attention than isolated dry tips. If the cause stays unclear, contact your state’s Cooperative Extension office and send photos of the whole plant, the pot, and the affected leaves.
Frequently asked questions
Should I cut brown tips off my spider plant?
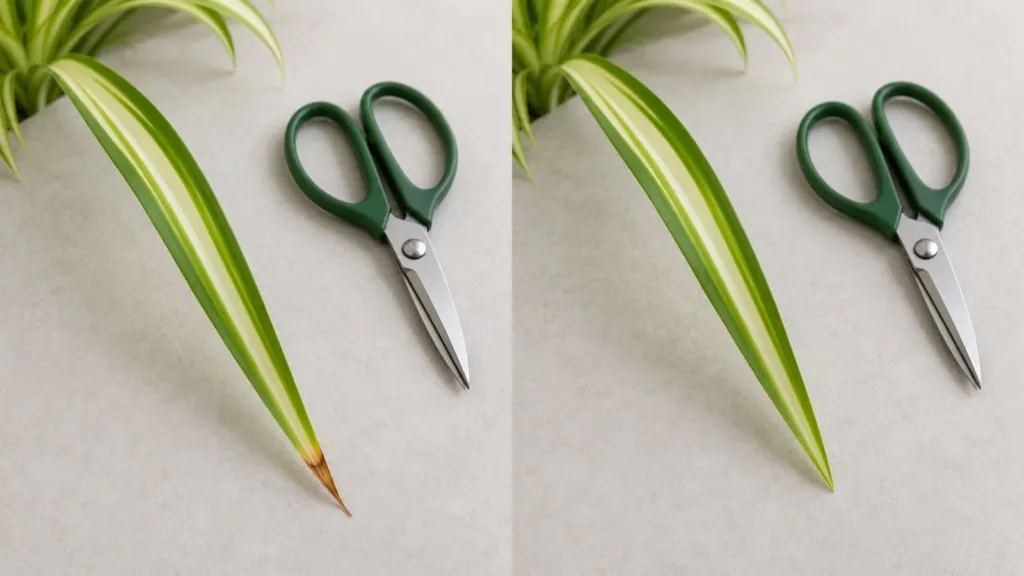
Yes, if the look bothers you. Use clean, sharp scissors and follow the leaf’s natural taper, removing the brown part and leaving green tissue. Trimming improves appearance, but new browning will appear if the root cause isn’t fixed.
How often should I water a spider plant with brown tips?
There’s no fixed schedule. Check the mix, water when it has dried slightly, and let it drain thoroughly. If the mix stays wet, look at drainage and the roots instead of adding more water.
Is tap water bad for spider plants?
Not always, but spider plants are among the plants most likely to react to chlorine, fluoride, or salts in tap water. NC State recommends avoiding tap water for them. If your tips brown while watering, drainage, and feeding all look fine, try rainwater or distilled water.
Should I mist a spider plant to stop brown tips?
No. Misting raises humidity for only a few minutes. A humidifier, grouping plants, or moving the plant away from vents does more.
Do brown tips mean my spider plant is dying?
Usually not. A few dry tips on otherwise firm, green leaves are a common cosmetic problem. Widespread yellowing, a soft base, or leaves that collapse are more serious and point toward watering or root trouble.
Your next ten minutes
Before your next watering, check the mix and empty any standing runoff. Photograph the affected leaves, then use the same view to monitor new growth and any spreading damage.